A running toilet is more than an irritant — it can waste thousands of litres of water per year and add meaningfully to your water bill. Most running toilet problems are caused by a small number of worn or misadjusted components inside the cistern that are straightforward to diagnose and repair without specialist tools. This guide explains how a toilet flush system works, how to diagnose the most common problems, and how to carry out the two most common repairs: flapper replacement and fill valve replacement.
How a Toilet Flush System Works
The cistern (the tank at the back of the toilet) contains two main components: the fill valve and the flush valve. Understanding both is the key to diagnosing any toilet problem.
- Fill valve (ballcock or float valve) — This controls the flow of water into the cistern after a flush. It is connected to the water supply line and opens to refill the cistern until the water reaches the correct level, at which point a float mechanism causes it to shut off automatically.
- Flush valve — This sits in the centre of the cistern base and controls the release of water into the bowl when you flush. The flapper (a rubber seal) sits over the flush valve opening. When you press the flush handle, the flapper lifts, water flows from the cistern into the bowl, then the flapper drops back down to seal the opening and allow the cistern to refill.
- Flapper — A circular rubber or silicone disc that forms the seal over the flush valve. Over time, rubber flappers harden, warp, or develop deposits that prevent them from sealing correctly, allowing water to continuously trickle from the cistern into the bowl.
Diagnosing a Running Toilet
A running toilet typically presents as a continuous sound of trickling or running water — either from the overflow pipe outside the property or from the toilet bowl itself. Remove the cistern lid and observe:
- If water is running over the top of the overflow tube (a vertical plastic tube inside the cistern), the fill valve is not shutting off correctly — the float may be set too high or the fill valve may be worn.
- If the water level is below the overflow tube but the toilet still runs, the flapper is likely not sealing correctly — water is bypassing the flapper and entering the bowl continuously.
- If the cistern fills and then the toilet flushes on its own after a period of quiet (known as "phantom flushing"), the flapper seal is failing slowly.
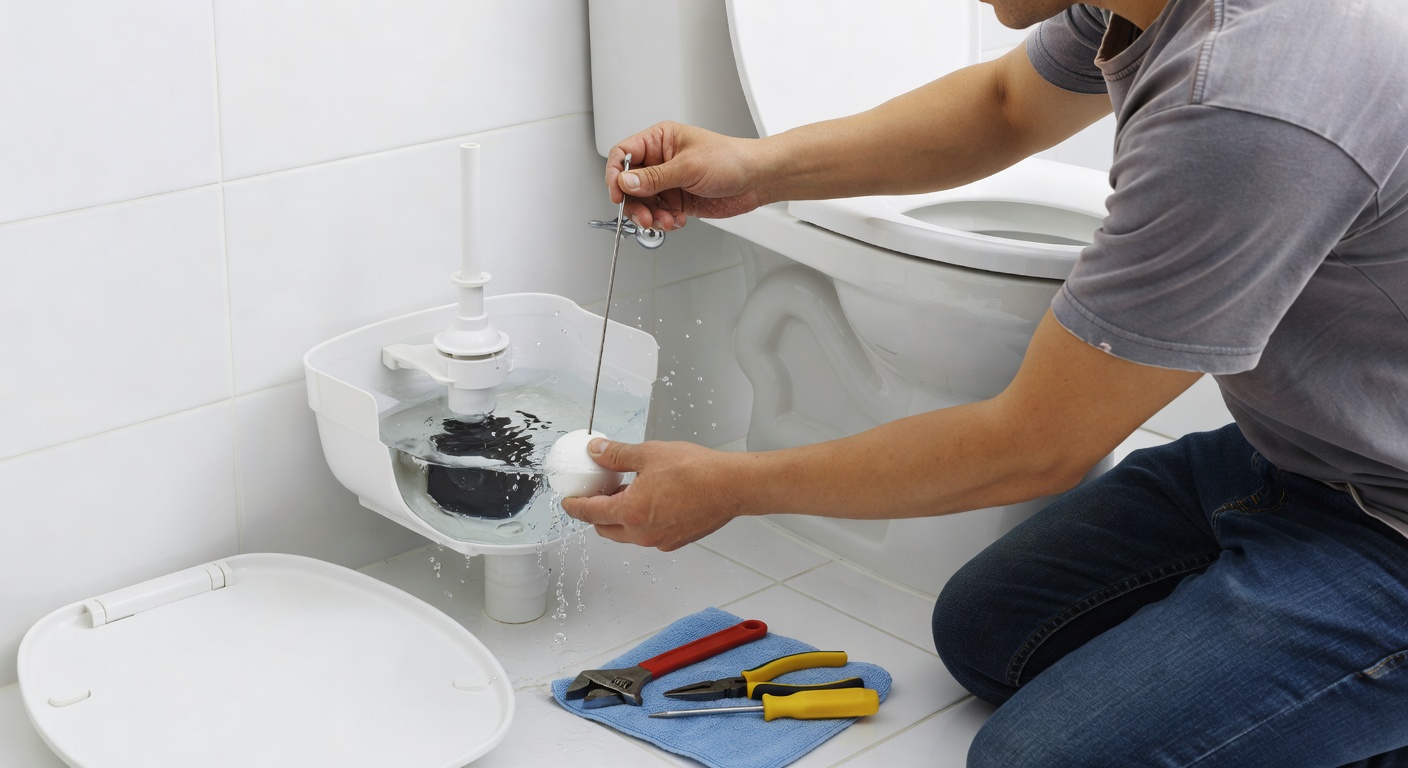
Step-by-Step: Flapper Replacement
-
1Shut Off the Water Supply Locate the isolation valve on the water supply pipe running to the bottom of the cistern — it is usually a small inline valve with a flat-head screw slot. Turn it clockwise until it stops. This shuts off the water supply to the cistern only, without affecting the rest of the property. If there is no isolation valve on the toilet supply pipe, use the main stopcock instead.
-
2Flush to Empty the Cistern Flush the toilet once to empty most of the water from the cistern. Remove the cistern lid and set it aside safely. If any water remains, use a sponge or dry cloth to remove it so you can work in a dry cistern. This also gives you a clear view of all the components.
-
3Remove the Old Flapper The flapper is connected to the flush valve by two ears or tabs on either side that hook onto pegs on the flush valve tower. Unhook these ears from the pegs. Then disconnect the chain or link that connects the flapper to the flush handle arm. Note the length of chain from the flapper to the arm handle — you will need to replicate this when fitting the new flapper (generally there should be about 1–2cm of slack in the chain when the flapper is closed). Take the old flapper with you when purchasing a replacement to ensure the correct size and fitting type.
-
4Fit the New Flapper Hook the ears of the new flapper onto the pegs on the flush valve tower, one side at a time. Ensure it sits flat and centred over the flush valve opening. Connect the chain to the flush handle arm at the same position as the original — adjust the clip position along the chain if needed to achieve 1–2cm of slack. A chain that is too short will hold the flapper open slightly; a chain that is too long will become tangled under the flapper and prevent sealing.
-
5Turn On the Water and Test Turn the isolation valve anticlockwise to restore the water supply. Allow the cistern to fill completely. Flush once and observe that the flapper lifts fully during the flush and then returns to a flat, seated position as the cistern empties and begins to refill. Listen for any signs of trickling once the cistern is full — if it is silent, the repair is successful. Replace the cistern lid.
Adjusting the Float Arm to Stop Phantom Flushing
If the cistern overfills — with water reaching the overflow tube — the fill valve float arm may need to be adjusted downward so that the valve shuts off at a lower water level. On a ballcock-style fill valve (with a large ball float on a metal or plastic arm), bend the arm slightly downward or adjust the screw or adjustment clip on the arm. On a modern cup or cylinder-style fill valve, there is usually an adjustment collar or screw on the valve body — twist or slide it to lower the shut-off level. The correct water level is typically 2–3cm below the top of the overflow tube. After adjusting, allow the cistern to refill fully and check the water level again.
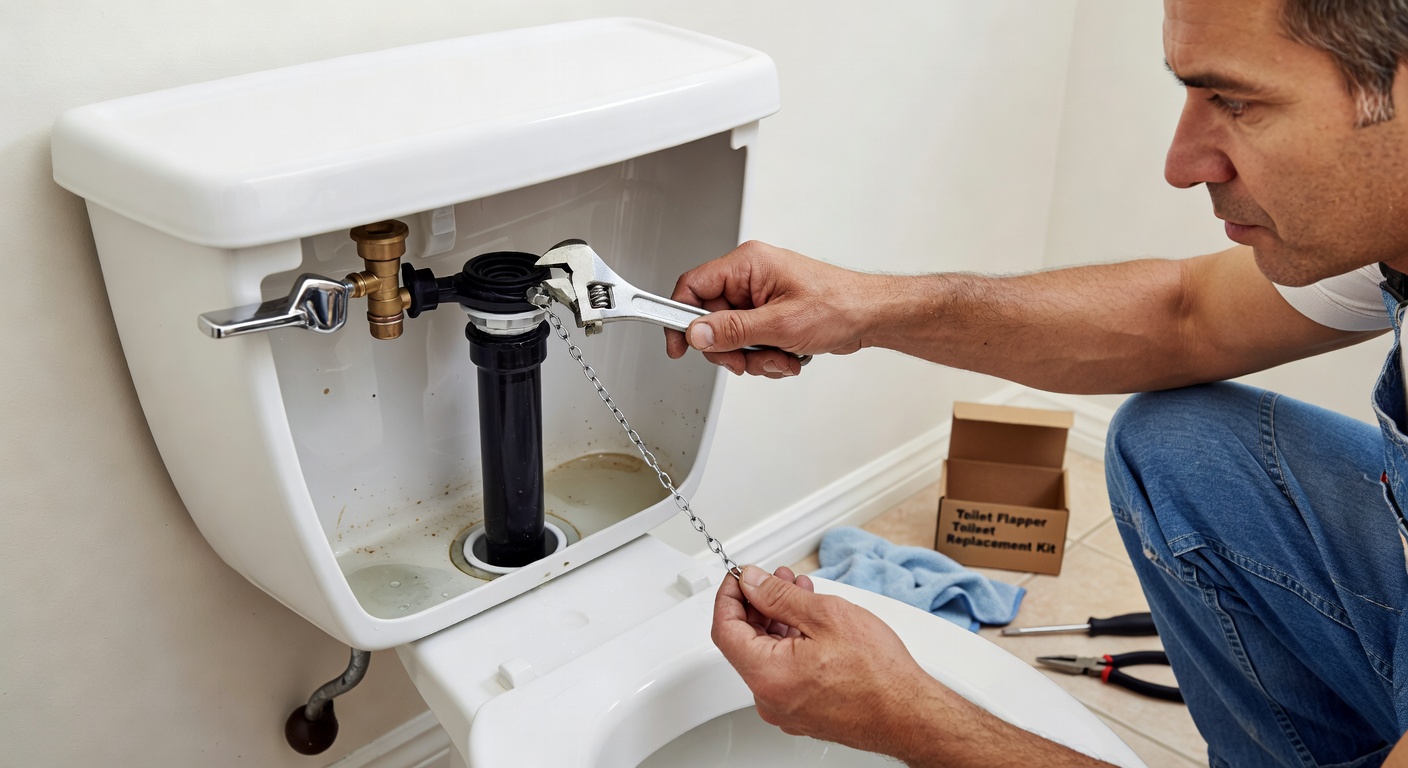
Fill Valve Replacement — Overview
If adjusting the float does not resolve an overfilling problem, or if the fill valve is noisy, slow-filling, or visibly cracked, replacing the entire fill valve is the next step. This involves shutting off the water supply, emptying the cistern, disconnecting the water supply hose from beneath the cistern, unscrewing the locknut that secures the fill valve to the cistern base, lifting the old valve out, and fitting a new universal fill valve in reverse order. New fill valves come with full fitting instructions and the process typically takes 20–30 minutes. The only tools required are an adjustable spanner and a dry towel.
When to Call a Plumber — The Wax Ring and Other Complex Repairs
Flapper and fill valve replacement are well within DIY capability for most homeowners. However, if the toilet rocks on the floor, if you notice water pooling around the base after flushing, or if there is a sewage smell coming from around the toilet base, this may indicate a failed wax ring — the seal between the toilet base and the floor drain. Wax ring replacement requires removing the toilet entirely (after shutting off the water supply and emptying both cistern and bowl), setting a new wax ring on the drain flange, and re-seating and bolting the toilet down. While technically possible as a DIY project, incorrect wax ring fitting can result in ongoing leaks and water damage — many homeowners prefer to call a licensed plumber for this repair.
To confirm that a flapper is leaking without visible signs, try this simple test: add a few drops of food colouring (any dark colour) to the cistern water. Wait 15–20 minutes without flushing. Then check the toilet bowl. If colour has appeared in the bowl water, the flapper is not sealing correctly and water is passing from the cistern into the bowl continuously. This test clearly identifies a flapper leak even before any sound is audible.