The bathroom is one of the most-used rooms in any home, yet it is often the last to receive a thorough, top-to-bottom deep clean. A regular weekly wipe-down keeps surface grime at bay, but a genuine deep clean — covering every fixture, every grout line, and every hidden corner — needs to happen at least once every one to two months. This guide walks you through a complete, methodical bathroom deep clean so that nothing is overlooked.
Gather Your Supplies First
Before you start, collect everything you will need. Stopping mid-clean to hunt for supplies allows cleaning agents to dry out and makes the whole process less efficient. For a full bathroom deep clean you will need: white vinegar, baking soda, a commercial toilet bowl cleaner, microfibre cloths (several), an old toothbrush for grout and tap bases, a grout brush, rubber gloves, a bucket, a squeegee, and an extendable duster for the exhaust fan cover and ceiling corners.
Step-by-Step Bathroom Deep Clean
-
1Start with the Toilet Apply toilet bowl cleaner around the inside rim of the bowl and leave it to work while you clean elsewhere. Return to scrub the bowl thoroughly with a toilet brush, paying attention to under the rim where mineral deposits and bacteria accumulate. Use a soapy microfibre cloth to wipe the exterior — the tank, handle, the outside of the bowl, the seat (top and underside), and the lid. Clean the base of the toilet where it meets the floor, a spot that is often missed and can harbour a surprising amount of grime.
-
2Clean the Sink and Taps Apply a small amount of baking soda directly to the sink basin and scrub with a damp cloth. Baking soda is mildly abrasive and removes soap scum without scratching most surfaces. Use an old toothbrush to clean around the base of the taps and the plug hole. For chrome taps with water stains or limescale, soak a cloth in white vinegar and wrap it around the affected area for 10–15 minutes before wiping clean. Polish the taps dry with a clean microfibre cloth for a streak-free finish.
-
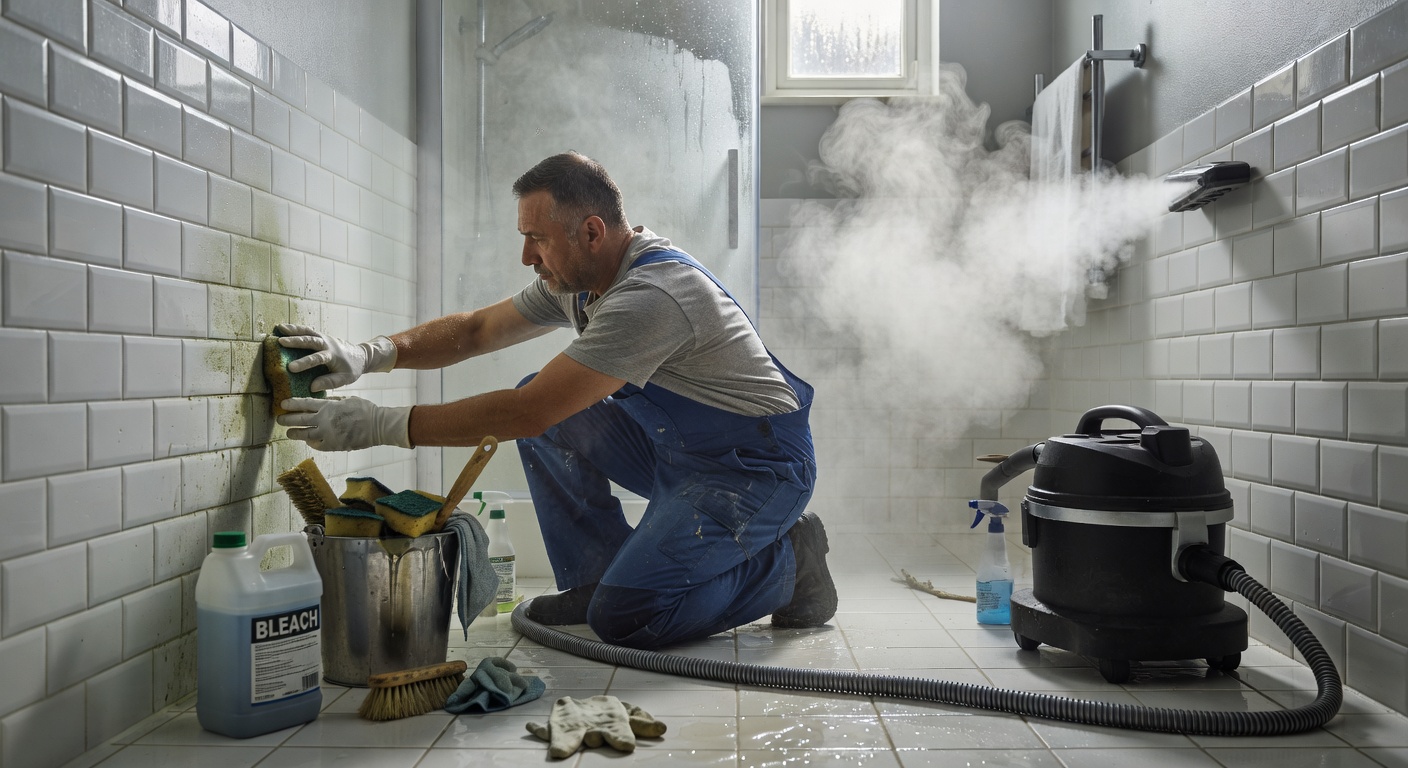
3Tackle the Shower Screen and Tiles Spray the shower screen liberally with a solution of equal parts white vinegar and water. Leave for five minutes, then wipe with a microfibre cloth and finish with a squeegee for a clear, streak-free result. For the tiles, apply an all-purpose bathroom cleaner, leave briefly, then wipe down. Pay extra attention to the corners and low areas of the shower enclosure where soap scum and mould are most likely to build up.
-
4Scrub the Grout Lines Make a paste of two parts baking soda and one part white vinegar. Apply this paste along the grout lines using an old toothbrush or a dedicated grout brush. Work the paste into the grout with a firm scrubbing motion, section by section. Leave for five minutes before rinsing with warm water. For grout that has become discoloured despite scrubbing, a diluted hydrogen peroxide solution can help restore a brighter appearance. Allow grout to dry fully before assessing whether further treatment is needed.
-
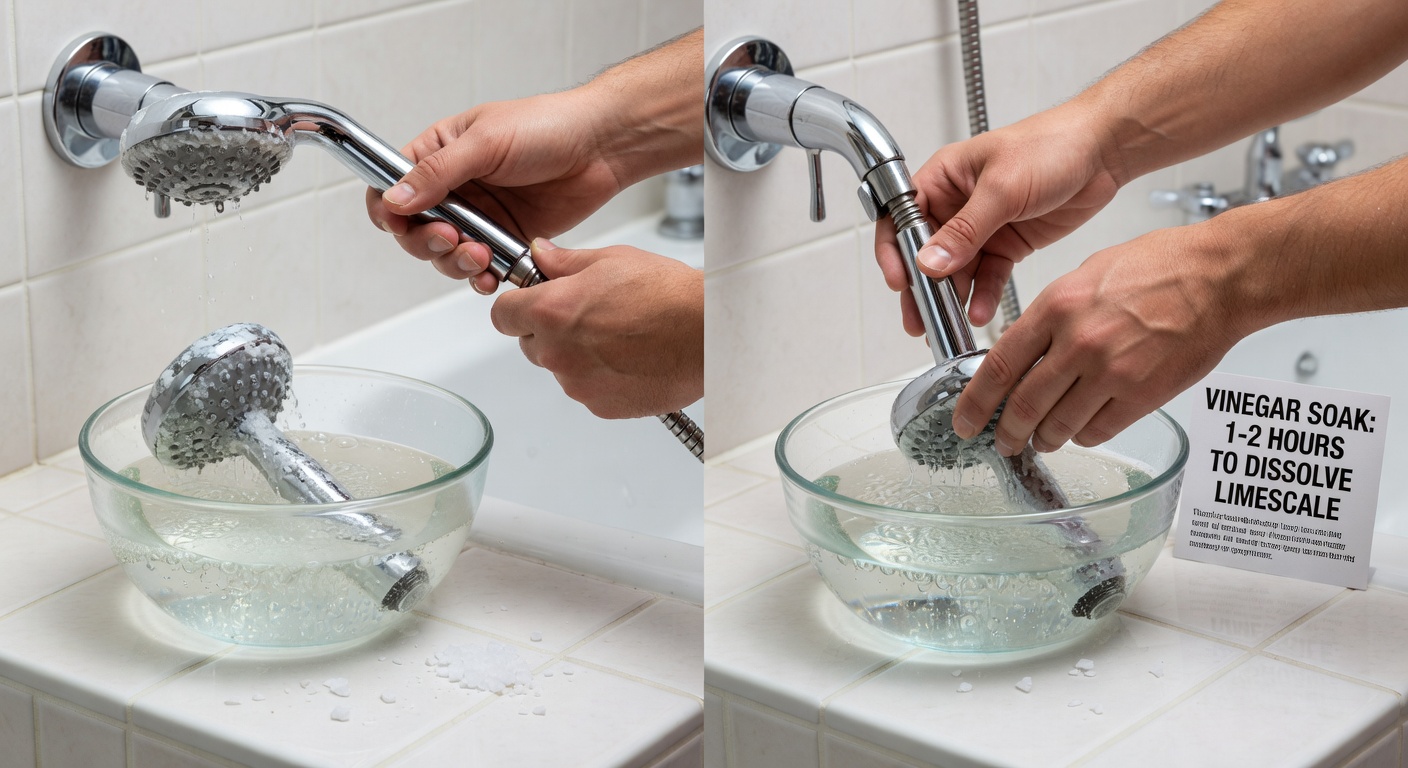
5Descale the Showerhead (Vinegar Soak Method) Fill a sturdy plastic bag with undiluted white vinegar — enough to fully submerge the showerhead when the bag is tied around it. Use a rubber band or cable tie to secure the bag around the showerhead so the nozzle is completely immersed in the vinegar. Leave overnight, or for a minimum of six hours. In the morning, remove the bag and run the shower on hot for two minutes to flush out any loosened mineral deposits. Use an old toothbrush to gently scrub any remaining residue from the nozzle holes. The difference in water pressure and spray pattern after this treatment is often immediately noticeable.
-
6Clean the Exhaust Fan and Floors Turn off the power to the exhaust fan at the switch (or circuit breaker for safety). Remove the cover grille and wash it in warm soapy water. Use a soft brush or vacuum crevice attachment to remove dust from the fan blades and the grille housing. Allow the cover to dry completely before replacing. For the floor, sweep or vacuum first to remove loose hair and debris, then mop with a pH-neutral floor cleaner. Pay attention to the edges of the room, around the base of the toilet, and the area around the bath or shower tray where grime collects in the corners.
Descaling the Showerhead — A Closer Look
Hard water — water with a high mineral content — is common across many parts of Japan and causes white, chalky limescale deposits to form on any surface where water evaporates regularly. The showerhead is particularly susceptible because the tiny nozzle holes can become partially or fully blocked by mineral build-up, reducing water pressure and causing the spray to become uneven or to spray sideways.
The overnight vinegar soak is the most effective home remedy because acetic acid in white vinegar dissolves calcium carbonate (the main component of limescale) efficiently without damaging the showerhead's finish. For showerheads with a removable faceplate, you can detach it and soak it directly in a bowl of vinegar rather than tying a bag to the fixture. For fixed showerheads, the bag method is equally effective.
If your showerhead has not been cleaned in a long time, you may need to repeat the vinegar soak after a day's interval. Some very thick limescale deposits require two or three treatments before they break down completely.
Bathroom Deep Cleaning Checklist
- Toilet bowl — inside, under rim, exterior, seat, lid, base
- Toilet cistern — wipe exterior; check inside annually
- Sink basin and plug hole
- Taps — limescale removal and polish
- Mirror — streak-free clean with glass cleaner
- Shower screen or bath — vinegar solution, squeegee finish
- Shower tiles — all-purpose cleaner, focus on corners
- Grout lines — baking soda paste scrub
- Showerhead — vinegar soak overnight
- Bath — descale taps, scrub basin, clean overflow
- Exhaust fan — dust grille, clean blades
- Cabinet and shelf surfaces — wipe inside and outside
- Floor — vacuum, then mop, including edges
Poor ventilation is the single biggest cause of recurring mould and mildew in bathrooms. After every shower, run the exhaust fan for at least 15–20 minutes, or open the window. If your bathroom does not have an exhaust fan, a small electric dehumidifier can make a significant difference. When deep cleaning, leave the bathroom well-ventilated after applying any cleaning product to allow fumes to dissipate and surfaces to dry thoroughly. Dry surfaces are far less hospitable to mould spores than damp ones.
Maintaining the Results
A deep clean is most worthwhile when supported by simple daily habits. After each shower, take 30 seconds to squeegee the screen and wipe down the tap area with a dry cloth. This prevents water spots and soap scum from accumulating and means that your next deep clean will take far less time and effort. Spray the shower tiles with a daily shower spray (available commercially, or make your own with diluted white vinegar) to inhibit mould growth between deep cleans.
Keep a small caddy with a toilet brush, a spray bottle of all-purpose cleaner, and a few microfibre cloths in the bathroom so that quick spot cleaning is always within reach. A bathroom that receives a little attention every day is a bathroom that only rarely needs a truly intensive deep clean.